Little Fox Sweater

Things are starting to get a bit chilly here so I thought I’d make up a new little sweater for Zoe. I know it is super trendy right now but I can’t help loving the fox and owl motifs I see out there these days. So stinkin’ cute!

IMG_1779

I decided to repurpose this old cashmere sweater that I had felted in the wash for a diaper project that never came to be. It is super soft! (My husband says that if Zoe won’t wear it I can change it into a pillow case for him.)IMG_1723

After perusing Etsy for a little inspiration I made this little fox applique from other wool sweater scraps.

IMG_1736

For the pattern I used this DIY Peasant Dress freebie from Once Upon a Sewing Machine. Zoe has 3 other tunics in her closet made from this pattern… simple, fast and easy (and it goes up to 4T!)

IMG_1767

The sweater cam together quickly and I added a little embroidery around the neck, passing the embroidery thread just through the top layer of stitches in the knit fabric. You can’t see the stitches on the inside.

IMG_1818

I like that while it is 18M to 2T size it will fit her for a really long time first as a sweater dress and later as a shirt.

IMG_1825

IMG_1840

If she wears it at all that is… She begs me to take it off almost as soon as it is on, making a photo shoot, already made challenging by a squirmy toddler on an overcast rainy day almost impossible. She reacts like this to new clothing quite often though, so I’ll not give up hope she will wear her fox sweater too soon.

IMG_1760

Llama Llama Returns

Long time Folk Haven readers may remember this post  from almost two years ago where I shared a llama rag doll I was inspired to make for Eli. I created the pattern based on illustrations in Anna Dewdney’s Llama Llama series of books. The main character in the stories has as little rag doll llama that is seen on nearly every page, but never mentioned. Eli has always loved his llama doll and Zoe now loves it as well.

llama rag dolls 2

Recently, on a whim, I posted a photo of it on a local Mom-to-Mom sales page on Facebook to see if there would be any other mothers interested in buying a llama doll for their kids. I posted my question at 10 pm and when I checked Facebook again at 6 the next morning I had 14 people wanting to place orders!

llama rag dolls


So, lately any free time I can get has been dedicated to llama creation! As is almost always the case with my sewing, I use repurposed materials for these little llamas. I love the thought of pieces of fabric from well-loved clothing finding a new life as part of a snuggly children’s toy. I also am enjoying how each of the little llamas has a very distinct personality… truly there are no two alike! I can make only about 1 a week so it is taking a while to fill the existing orders. In addition people have contacted me about creating other sorts of critters and literary lovies for them. My next pattern to draft will be a pig inspired by Laura Numeroff’s If You Give a Pig a Pancake. I also will be designing a horse (not so very different from a llama), an owl and an elephant.


IMG_1458If I can ever catch up with local orders I plan to put some of these in my Etsy shop, which has been sitting empty and gathering dust for a very long time. I have also created a Facebook page for Folk Haven Creations to have a place to post llamas as they are created and available for sale.

corduroy rag doll

I haven’t done much sewing at all since well before Zoe was born, so I am enjoying this return to a bit of a creative outlet.


E is for Elephant

Elephant SoftieI’ve not been doing a whole lot of sewing or crafting as of late, but as I have been waiting for this baby to come I realized I wanted Eli to have something new and Mama-made to hold onto when I go to the hospital. Due to the flu season being what it is this year they are limiting all visitors to the maternity floor to spouses and the baby’s grandparents only, and certainly no children under 16 years of age allowed! This is going to be a bit hard on Eli (and me as well, if I’m honest) even though I know he will be well taken care of while I am absent.

I like seeing the softies that other people make in magazines at the book store. They are so ugly-cute and fun. It’s a no-pressure project because as long as it holds together you really can’t go wrong.

crocheting an elephant ear

I started off by crocheting a pair of ears. They came out slightly differently shaped but once sewn onto the head I found they were just fine.

Elephant softie side view

The body and trunk are made with a remnant from a man’s shirt that had been used previously in a quilting project. The arms and legs were from an old felted wool sweater. I embroidered an “E”, added a braided tail and finished the critter off with a couple of button eyes.

Eli hugging his elephant

Simple, quick and definitely huggable.

Eli’s Pocoyo Hat

When I began this blog over a year ago one of the first sewing projects I posted about was this Up-Cycled Boy Hat I had sewn for Eli. I followed the tutorial I found on I Am Momma Hear Me Roar. (The link can be found in my original post.) It is constructed from fabric from old t-shirts and pajama pants.

Unfortunately Eli was decidedly less thrilled with it than I was. It wasn’t personal. He firmly held the belief that all headcoverings were evil instruments of torture. There passed many a winter day when I reflected upon the fact that our decision to move to Southern California from the Chicago area before he joined our family might prove to be a key factor in his reaching adulthood with ears still attached to his head in a form not grotesquely mishapen by frostbite.

He doesn't look so happy, but he really does like his hat (I promise!)

He doesn’t look so happy, but he really does like his hat (I promise!)

A couple of weeks ago I found the hat languishing in the back of a closet and pulled it out. Eli saw it and declared “my Pocoyo hat!” (The Pocoyo connection had never even occured to me… in fact when I made it I had never even heard of Pocoyo.) In that instant I found that I too loved Pocoyo. The next day he wore it to preschool and refused to take it off all day long.

Eli's Pocoyo hat

Felt Play Food

Back when I was on bed rest I posted that I’d be spending some of my time sewing felt play food for Eli. Here is what I managed to accomplish in that time. Since being released I haven’t made any more but I hope to as time goes on as this is a lot of fun, for both of us. There is already a wealth of tutorials already available on the web so this is just more of a “show and tell” post. Scroll down to the bottom for links to tutorials if you also want to get started making felt food but need additional guidance or inspiration.bow tie pasta 2

First up is the whole grain bow tie pasta. Super simple to make! The pans and utensils were found uber cheap at Ikea. I think the cooking utensils (maybe 6 or so?) were $5, and the pots and pans set, including pot, strainer, lid, frying pan and sauce pan (perhaps something more but we aren’t living at home now so I can’t check) was $10.bow tie past 1

Fresh tomatoes. felt tomatos

Sliced tomatoes.Sliced tomatos

A hamburger to put the tomatoes on. Have you ever seen this Pink Panther scene where Steve Martin plays a Frenchman trying to learn to pronounce the word “hamburger” like an American? Eli cracks me up because he has a unique way of pronouncing “hamburger” as well and always reminds me of this scene. He asks for hamburgers often, but what he really wants is a hamburger bun slathered in ketchup, and perhaps a little mustard. He does use the felt version of the hamburger patty on the bun though.

felt hamburger patty

Would you like one egg…felt fried egg

or two?two felt fried eggs

That’s all I got thus far. I’ll share more if/when it gets made.  🙂

Tutorial Links:

Felt Lettuce Leaves

Felt Corn on the Cob

Huge List of Tutorial Links (Apartment Therapy)

 
Here’s where I’m linking up:

Sunday:

I {heart} Naptime,  Flamingo Toesjembellish clothes upcycling page,

Blissful and Domestic,

Monday:

Skip to My LouThe Gunny SackSew Can DoKeeping It Simple An Original Belle,

I Should be Mopping the FloorThe Dedicated House ,

A Round Tuit,  C.R.A.F.T.,  diy home sweet home,

Craft-O Maniac, Sew Chatty, Sarahndipities The Cure for the Common Monday

Tuesday:

Not Just a HousewifeHope StudiosFunky Polkadot GiraffeKammy’s Korner,

Home Stories A to Z,  Crafty Confessions, Homemade Tuesday,  Today’s Assignment,

Antiprocrastination TuesdayTake-a-Look Tuesday,  Nifty Thrifty Tuesday,

The Creative Itch BoutiqueSchwin and SchwinHeart and Soul Blog Hop

Wednesday:

Sew Much AdoFrugally Sustainable,  Lil’ LunaSomeday CraftsWhimsy

WednesdayWhatcha Work Up Wednesday

Thursday:

Mom On TimeoutThrifty DecoratingBear Rabbit BearThriving on Thursdays

The Crafty BlogstalkerThe Shabby Creek CottageHouse of Hepworths,

Sorta Crunchy, Delightful OrderAnything Goes Linky Party,

Friday:

Simply DesigningWhipperberry,  Happy Hour Projects

Joyful StamperMaking Lemonade BlogThirty Handmade Days,

Naptime CraftersRomantic HomeFinding FabulousDiana Rambles,

Shabby NestFrench Country Cottage, The Charm of HomeThe Grant Life,

At the Picket FenceFingerprints on the Fridge, One Artsy Mama,

Saturday:

The Gingerbread BlogToo Much Time On My HandsHello Weekend,

Six Sisters StuffSerenity YouBe Different Act Normal

Big Butt Baby Pants

IMG_8784 In preparing for little Zoe’s arrival I’ve sewn up some of Made by Rae’s Big Butt Baby Pants. They are hopefully roomier and will make fitting the fluffy-bummed cloth diapered baby into clothing a little bit easier. I’ve liked this pattern for a long time and have enjoyed seeing the many versions of the pants made up by other people. I’ll warn you that a person could conceivably die of cuteness seeing Inder Love Folk Art’s owl version of these pants seen here, or these here (especially the red ones with the mushrooms and woodland animals on the butt). These pants look so much better with an adorable baby wearing them!

Green and Blue Big Butt Baby Pants

I tried to take the lazy woman’s approach by using sleeves off of old shirts and I think I actually created more difficulties for myself than if I had just followed the pattern exactly like a good girl. Live and learn… I know I’ll be making more of these (and at least I didn’t have to hem.) I actually even bought a few fat quarters of fabric that I thought would be cute for these pants. (If you follow this blog you know that I almost always use only reclaimed fabric. I’m cheap frugal like that.) The blue above is one of them and the rest still are waiting to be sewn up.

Striped Big Butt Baby Pants I plan on embellishing some onesies to go with these pants, but haven’t gotten around to it yet. I’d better not wait much longer as I’m now at 31 weeks and I know the rest of the pregnancy will go by quickly as I try to get everything done!

Here’s where I’m linking up:

Sunday:

I {heart} Naptime,  Flamingo Toesjembellish clothes upcycling page,

Blissful and Domestic,

Monday:

Skip to My LouThe Gunny SackSew Can DoKeeping It Simple An Original Belle,

I Should be Mopping the FloorThe Dedicated House ,

A Round Tuit,  C.R.A.F.T.,  diy home sweet home,

Craft-O Maniac, Sew Chatty, Sarahndipities The Cure for the Common Monday

Tuesday:

Not Just a HousewifeHope StudiosFunky Polkadot GiraffeKammy’s Korner,

Home Stories A to Z,  Crafty Confessions, Homemade Tuesday,  Today’s Assignment,

Antiprocrastination TuesdayTake-a-Look Tuesday,  Nifty Thrifty Tuesday,

The Creative Itch BoutiqueSchwin and SchwinHeart and Soul Blog Hop

Wednesday:

Sew Much AdoFrugally Sustainable,  Lil’ LunaSomeday CraftsWhimsy

WednesdayWhatcha Work Up Wednesday

Thursday:

Mom On TimeoutThrifty DecoratingBear Rabbit BearThriving on Thursdays

The Crafty BlogstalkerThe Shabby Creek CottageHouse of Hepworths,

Sorta Crunchy, Delightful OrderAnything Goes Linky Party,

Friday:

Simply DesigningWhipperberry,  Happy Hour Projects

Joyful StamperMaking Lemonade BlogThirty Handmade Days,

Naptime CraftersRomantic HomeFinding FabulousDiana Rambles,

Shabby NestFrench Country Cottage, The Charm of HomeThe Grant Life,

At the Picket FenceFingerprints on the Fridge, One Artsy Mama,

Saturday:

The Gingerbread BlogToo Much Time On My HandsHello Weekend,

Six Sisters StuffSerenity YouBe Different Act Normal

Treasure Pocket Pants

Sewing for Boys: 24 Projects to Create a Handmade Wardrobe

Image courtesy of Amazon.com.

I’m excited to share my latest attempt at a sewing project from Sewing for Boysthe Treasure Pocket Pants!

IMG_8627

This was begun just before I landed on bed rest and it taunted me in it’s pile of pieces on the sewing table throughout the duration of my time down. Once I was cleared to get up I attacked it with a vengance as I really wanted Eli to have this pair of pants in time for Christmas. All told I spent about 3 weeks on it as it just takes me forever and many mishaps to sew up things according to other people’s instructions. I just keep reminding myself that it is all part of the learning process. And I did learn a lot… including how to make a faux fly!

Treasure Pocket Pants side panel 1

The side panels are pieced together from old t-shirts and other articles of clothing I had been saving exactly for this purpose for quite some time. To avoid having the knit fabric stretch too much during assembly I backed the assembled panels with muslin.

IMG_8630

I hit a bit of a wall during the construction of these pants in that the pattern pieces for the side panel above the pocket and the rest of the side panel were different widths. I measured and remeasured and wondered how I could be messing up so royally and yet be unable to find my error. I was very pleased to discover that I was not at all at fault (for once!) and that there has since been published a corrected pattern piece that can be downloaded and printed off the web. (www.sewing-for-boys.com/ updatesanderrata/)

Eli in Treasure Pocket Pants Christmas Day

In addition to the side panels, all the other fabric used to make these pants was reclaimed from old clothing as well. I really like that this one pair of pants helped make a bit of a dent in my stash of fabric for repurposing.

IMG_8663

This was featured!
A Jennuine Life Thrifty to Nifty Thursdays Feature
Here’s where I’m linking up:

Sunday:

I {heart} Naptime,  Flamingo Toesjembellish clothes upcycling page,

Blissful and Domestic,

Monday:

Skip to My LouThe Gunny SackSew Can DoKeeping It Simple An Original Belle,

I Should be Mopping the FloorThe Dedicated House ,

A Round Tuit,  C.R.A.F.T.,  diy home sweet home,

Craft-O Maniac, Sew Chatty, Sarahndipities The Cure for the Common Monday

Tuesday:

Not Just a HousewifeHope StudiosFunky Polkadot GiraffeKammy’s Korner,

Home Stories A to Z,  Crafty Confessions, Homemade Tuesday,  Today’s Assignment,

Antiprocrastination TuesdayTake-a-Look Tuesday,  Nifty Thrifty Tuesday,

The Creative Itch BoutiqueSchwin and SchwinHeart and Soul Blog Hop

Wednesday:

Sew Much AdoFrugally Sustainable,  Lil’ LunaSomeday CraftsWhimsy

WednesdayWhatcha Work Up Wednesday

Thursday:

Mom On TimeoutThrifty DecoratingBear Rabbit BearThriving on Thursdays

The Crafty BlogstalkerThe Shabby Creek CottageHouse of Hepworths,

Sorta Crunchy, Delightful OrderAnything Goes Linky Party, A Jennuine Life,

Friday:

Simply DesigningWhipperberry,  Happy Hour Projects

Joyful StamperMaking Lemonade BlogThirty Handmade Days,

Naptime CraftersRomantic HomeFinding Fabulous, Diana Rambles,

Shabby NestFrench Country Cottage, The Charm of HomeThe Grant Life,

At the Picket FenceFingerprints on the Fridge, One Artsy Mama,

Saturday:

The Gingerbread BlogToo Much Time On My HandsHello Weekend,

Six Sisters StuffSerenity YouBe Different Act Normal

“Baked” Potato Microwave Bag

At the Christmas Eve Eve celebration we attended this bag was given as a hostess gift. I heard people raving about how well it works and it looks super easy to make. The potatoes made this way taste oven-baked, with the exception of not being crispy on the outside, and are so much faster to make with less energy consumption than the traditional way. We don’t use a microwave at our house so I won’t be sewing up one to make a tutorial myself, but I found one here.

Microwave Potato Bag

The tutorial calls for using batting, but the bag circulating at the party (and the ones others were speaking about that they had received and used) did not use any batting, just quilting fabric on the outside and flannel inside.

While looking for a tutorial to link to I did find some important advice on other sites. It is important to use only 100% cotton materials, NO polyester at all, or there is a risk of the bag catching fire in the microwave (not to mention potential unsavory synthetic off-gassing). Also regardless of the fabric size recommended in the tutorial, double check that the potato bag is small enough to clear the sides of your microwave by at least an inch.

IMG_8598

Close up of the instruction label pinned to the microwave potato bag.

Whether made for yourself or to give as a gift, this is one super quick and easy project that receives rave reviews… just thought I’d pass it on. 🙂

Here’s where I’m linking up:

Sunday:

I {heart} Naptime,  Flamingo Toesjembellish clothes upcycling page,

Blissful and Domestic,

Monday:

Skip to My LouThe Gunny SackSew Can Do, Keeping It SimplePolly Want a

Crafter An original Belle,  I Should be Mopping the FloorThe Dedicated House 

A Round Tuit,  C.R.A.F.T.,  diy home sweet home,

Craft-O Maniac, Sew Chatty, Sarahndipities The Cure for the Common Monday

Tuesday:

Not Just a HousewifeHope StudiosFunky Polkadot GiraffeKammy’s Korner,

Home Stories A to Z,  Crafty Confessions, Homemade Tuesday,  Today’s Assignment,

Antiprocrastination TuesdayTake-a-Look Tuesday,  Nifty Thrifty Tuesday,

The Creative Itch BoutiqueSchwin and SchwinHeart and Soul Blog Hop

Wednesday:

Sew Much AdoFrugally Sustainable,  Lil’ LunaSomeday CraftsWhimsy

WednesdayWhatcha Work Up Wednesday

Thursday:

Mom On TimeoutThrifty DecoratingBear Rabbit BearThriving on Thursdays

The Crafty BlogstalkerThe Shabby Creek CottageHouse of Hepworths,

Sorta Crunchy, Delightful OrderAnything Goes Linky Party,

Friday:

Simply DesigningWhipperberry,  Happy Hour Projects

Joyful StamperMaking Lemonade BlogThirty Handmade Days,

Naptime CraftersRomantic HomeFinding Fabulous,

Shabby NestFrench Country Cottage, The Charm of HomeThe Grant Life,

At the Picket FenceFingerprints on the Fridge, One Artsy Mama,

Saturday:

The Gingerbread BlogToo Much Time On My HandsHello Weekend,

Six Sisters StuffSerenity YouBe Different Act Normal

Fairy Mushroom Ornament

Fairy Mushroom Ornament

The end is almost in sight for this year’s ornament making. This latest creation is for my mother-in-law who has a small Christmas tree in her kitchen dedicated to fairies.

Mushroom Fairy

Mushroom Fairy (Photo credit: amboo who?)

In my limited knowledge of the world of fairies, it seems to me that they often seem to be congregating around or living in mushrooms (or are they toadstools?).

Fairy's toadstool

Fairy’s toadstool (Photo credit: katmary)

I decided to make a little mushroom fairy house ornament  for her tree. I had seen the idea here on Etsy.

English: Fairy tale toadstool Fly agaric (Aman...

English: Fairy tale toadstool Fly agaric (Amanita muscaria) on roadside in Bedham Copse. Don’t eat these unless you particularly enjoy vomiting, diarhoea and wishing you were dead. (Photo credit: Wikipedia)

I didn’t realize before making this that there is an actual fairy tale toadstool that has a red cap. Hopefully my erroneous choice of color isn’t too large of a faux paus.

IMG_8472

I attached an assortment of beads to the top in a random manner to make it look spotted and speckled.

Now it is all boxed up and ready to be wrapped for giving on Christmas Day. (Hopefully my assumption that she doesn’t avidly follow this blog isn’t too far off the mark… If I’m wrong, sorry to ruin the surprise, Susan!)

IMG_8476

Here’s where I’m linking up:

Fall Into The Holidays

Sunday:

I {heart} Naptime,  Flamingo Toesjembellish clothes upcycling page,

Blissful and Domestic,

Monday:

Get Outta My Head PleaseSkip to My LouThe Gunny SackSew Can Do,

A Round Tuit,  C.R.A.F.T.,  diy home sweet home,

Craft-O Maniac, Sew Chatty, Sarahndipities The Cure for the Common Monday

Tuesday:

Not Just a HousewifeHope StudiosFunky Polkadot GiraffeKammy’s Korner,

Home Stories A to Z,  Crafty Confessions, Homemade Tuesday,  Today’s Assignment,

Antiprocrastination TuesdayTake-a-Look Tuesday,  Nifty Thrifty Tuesday,

The Creative Itch BoutiqueSchwin and SchwinHeart and Soul Blog Hop

Wednesday:

Sew Much AdoFrugally Sustainable,  Lil’ LunaSomeday CraftsWhimsy

WednesdayWhatcha Work Up Wednesday

Thursday:

Mom On TimeoutThrifty DecoratingBear Rabbit BearThriving on Thursdays

The Crafty BlogstalkerThe Shabby Creek CottageHouse of Hepworths,

Sorta Crunchy, Delightful OrderAnything Goes Linky Party,

Friday:

Simply DesigningWhipperberry,  Happy Hour Projects

Joyful StamperMaking Lemonade BlogThirty Handmade Days,

Naptime CraftersRomantic HomeFinding Fabulous,

Shabby NestFrench Country Cottage, The Charm of HomeThe Grant Life,

At the Picket FenceFingerprints on the Fridge, One Artsy Mama,

Saturday:

The Gingerbread BlogToo Much Time On My HandsHello Weekend,

Six Sisters StuffSerenity YouBe Different Act Normal

Leather-Backed Hand-Drawn Fabric Ornaments

Owl with Candy Cane Ornament

I’ve been wanting to try my hand at drawing on fabric with Sharpie for a while to create some fabric with an unique print to sew into clothing for Eli. I just kept assuming the ink would bleed and I wouldn’t be able to get any crisp lines and so I never really have gotten around to actually experimenting. While using a pair of my old khakis to sew him some new trousers though I looked into the waste basket and realized I was throwing away small scraps that would be perfect for trying out my idea.  I sketched a few things and then realized I could put my little experiments to use making Christmas ornaments!

These are quick, fun and easy. As for subject matter you are limited only by what you can draw within a little circle. I made some owl themed ornaments just because… what’s not to like about owls?! Then I made some ornaments for my nieces based on their personal interests.

Step 1

Trace a circle on cloth

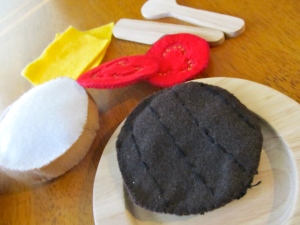
Choose some scrap fabric. A tight weave works best. Trace a circle in pencil onto the fabric. I used a biscuit cutter and that seemed about the perfect size for the ornaments I wanted to make.

Step 2

Draw on fabric with your Sharpie

Draw the designs you want onto the fabric with your thin point Sharpie. I’m embarrassed to say that most of these owls I copied from a search I did on Pinterest. I went back to find the sources to give credit where credit is due, but a couple of weeks have passed and the old search results aren’t coming up. Shame… If you recognize your design here or know the source please let me know! The candy cane owl was  holding a little bouquet of flowers in the original source.

Step 3

If you wish you can add a little bit of acrylic or fabric paint.

Paint the ornament design if desired

painted ballerina slipper

Step 4

Here is the point where I forgot to take pictures, so bear with me! I cut identically sized circles from scrap leather for the back of the ornament. You could use fabric and sew right sides together, then turn right side out before stuffing if you want. I liked using the leather because it is thicker and I wanted my sewing lines to become part of the design. I put a doubled length of ribbon in the seam at the top of the ornament before sewing it and started sewing nearer to the bottom of the ornament. I went almost all the way around the circle with a 1/4″ margin and stopped.

Step 5

Stuff the ornament through the gap you left in your stitching.

Stuff the ornament

Step 6

Owl with Candy Cane Ornament

After the ornament is stuffed I sew around and around the outer edge making a line that looks a bit like you scribble-doodled a circle. On this ornament I then went back in and embroidered the candy cane stripes and a thicker red dashed line around the outside as well.

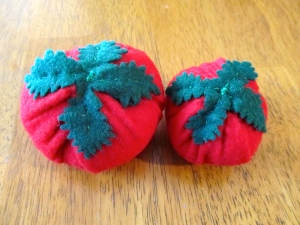
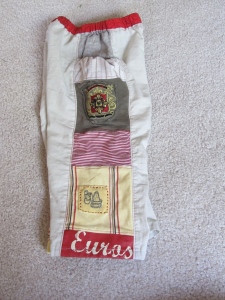
Here are some of the other ornaments I’ve made in this style so far.

Assorted stuffed ornaments

Here’s where I’m linking up:

Fall Into The Holidays

Sunday:

I {heart} Naptime,  Flamingo Toesjembellish clothes upcycling page,

Blissful and Domestic,

Monday:

Get Outta My Head PleaseSkip to My LouThe Gunny SackSew Can Do,

A Round Tuit,  C.R.A.F.T.,  diy home sweet home,

Craft-O Maniac, Sew Chatty, Sarahndipities The Cure for the Common Monday

Tuesday:

Not Just a HousewifeHope StudiosFunky Polkadot GiraffeKammy’s Korner,

Home Stories A to Z,  Crafty Confessions, Homemade Tuesday,  Today’s Assignment,

Antiprocrastination TuesdayTake-a-Look Tuesday,  Nifty Thrifty Tuesday,

The Creative Itch BoutiqueSchwin and SchwinHeart and Soul Blog Hop

Wednesday:

Sew Much AdoFrugally Sustainable,  Lil’ LunaSomeday CraftsWhimsy

WednesdayWhatcha Work Up Wednesday

Thursday:

Mom On TimeoutThrifty DecoratingBear Rabbit BearThriving on Thursdays

The Crafty BlogstalkerThe Shabby Creek CottageHouse of Hepworths,

Sorta Crunchy, Delightful OrderAnything Goes Linky Party,

Friday:

Simply DesigningWhipperberry,  Happy Hour Projects

Joyful StamperMaking Lemonade BlogThirty Handmade Days,

Naptime CraftersRomantic HomeFinding Fabulous,

Shabby NestFrench Country Cottage, The Charm of HomeThe Grant Life,

At the Picket FenceFingerprints on the Fridge, One Artsy Mama,

Saturday:

The Gingerbread BlogToo Much Time On My HandsHello Weekend,

Six Sisters StuffSerenity YouBe Different Act Normal

« Older entries